How to DIY 4 Strand Braided Ribbon Bracelet

Are you looking for DIY fashion ideas for the summer? How about making some stylish braided bracelets? They are colorful, easy to make and can have a lot of variations in terms of materials, colors and braids. I have featured a lot of crafts projects using ribbon. But making a ribbon bracelet is something new and interesting to me. Here is a pictured tutorial on how to weave a 4 strand braided ribbon bracelet. It looks very simple yet stylish. You may use other color combinations of ribbon to create your own style. It will definitely be an attractive ornament on your wrist. Let’s make some of these ribbon bracelets to add to our fashion collection or send as gifts for friends. Happy crafting!
Here are the things you may need:Start braiding. Turn the blue strands to the inside, and cross the left strand over the right strand. It should look like this:
- Ribbon: white, light blue, orange, black;
- Pliers;
- Bracelet clasps;
- Ribbon clamps;
- Metal rings;
- Glue.
Instructions:
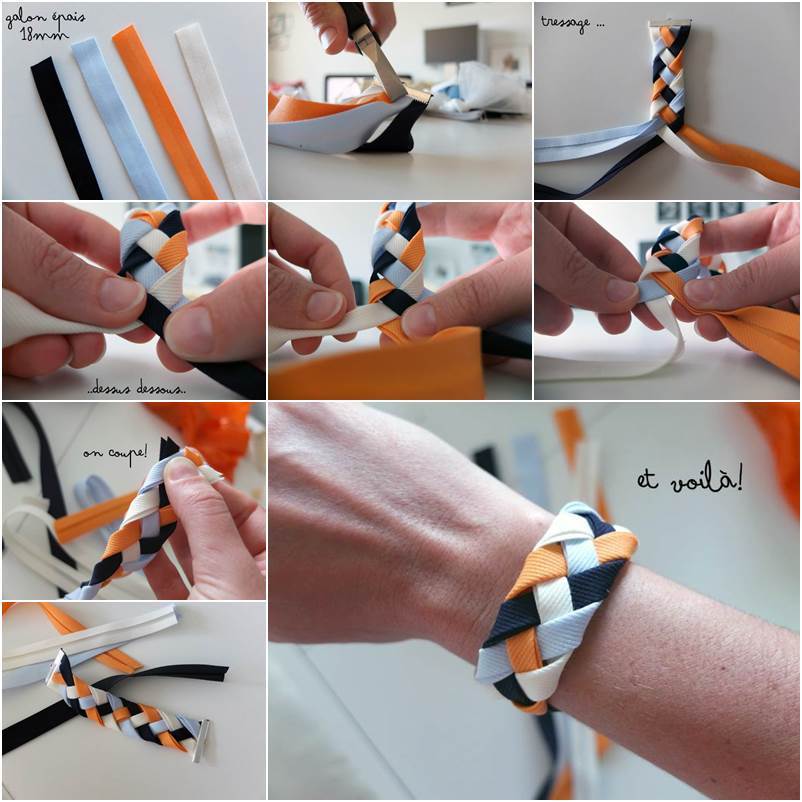
- Take 4 strands of ribbon and fold in half for each of them.
- Fix one end of all the strands with a ribbon clamp, secure with glue and pliers;
- Start braiding by overlapping the light blue strand on the white strand.
- Overlap the black strand on the orange strand. This is the first round of braiding.
- Start the second round of braiding by overlapping the white strand on the black strand.
- Turn the light blue strand and the orange strand inside, overlapping each other as shown in the picture.
- Continue weaving until you have the desired length.
- Trim the extra ribbon and again fix the end of the strands with a ribbon clamp.
- Install the metal rings and clasps.