DIY Milk Carton Desktop Organizer
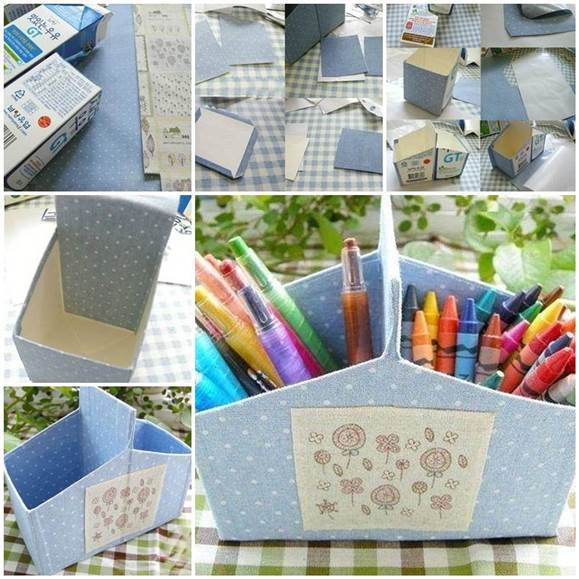
It is awesome to take some recycled milk cartons and make a nice desk organizer, as shown in this DIY project. This desk organizer is a great space saver to put away kids’ stuffs such as pencils, crayons, scissors, and small accessories. It is super easy to make and you can be rest assured that everything will be organized and looking nice on the desk. You can use your favorite wrapping paper or fabric to create your own style. Happy crafting!
Here are the supplies you may need:
- Empty milk cartons;
- Craft knife and scissors;
- Ruler;
- Wrapping fabric or paper with colors and patterns of your choices;
- Glue;
- Ornaments (optional).

Instructions:
- Thoroughly wash and dry the inside and outside of the milk cartons.
- Cut the milk cartons in half in a tilted way as shown in the picture. Now you’ll have two identical storage boxes from the cut out milk cartons.
- Connect the higher sides of the two boxes and secure with glue.
- Measure the sizes of the boxes’ sides and cut out some milk carton pieces with the same sizes.
- Create some fabric pieces to wrap the milk carton pieces and secure with glue. Please note that the fabric pieces should be slightly larger than the milk carton pieces in order to wrap them.
- Glue the wrapped pieces to the outside sides of the boxes. This will help to reinforce the desk organizer.
- Create some fabric pieces to cover the inside sides of the boxes.
- Use ornaments to decorate the desk organizer.
- Place pens, crayons etc. inside the desk organizer. Here you go! Enjoy!
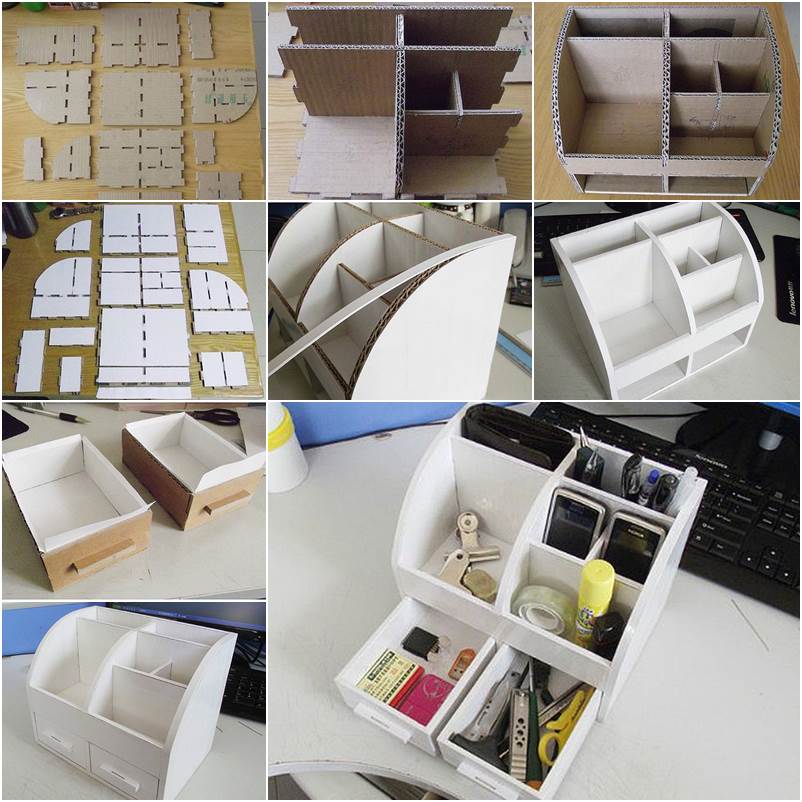
You may also like this cardboard desktop organizer with drawers.